
DIY Fall Garland
Total Project Time:
2.5 hours (30 minutes if you don't include drying the oranges)
Difficulty Level:
EASY!
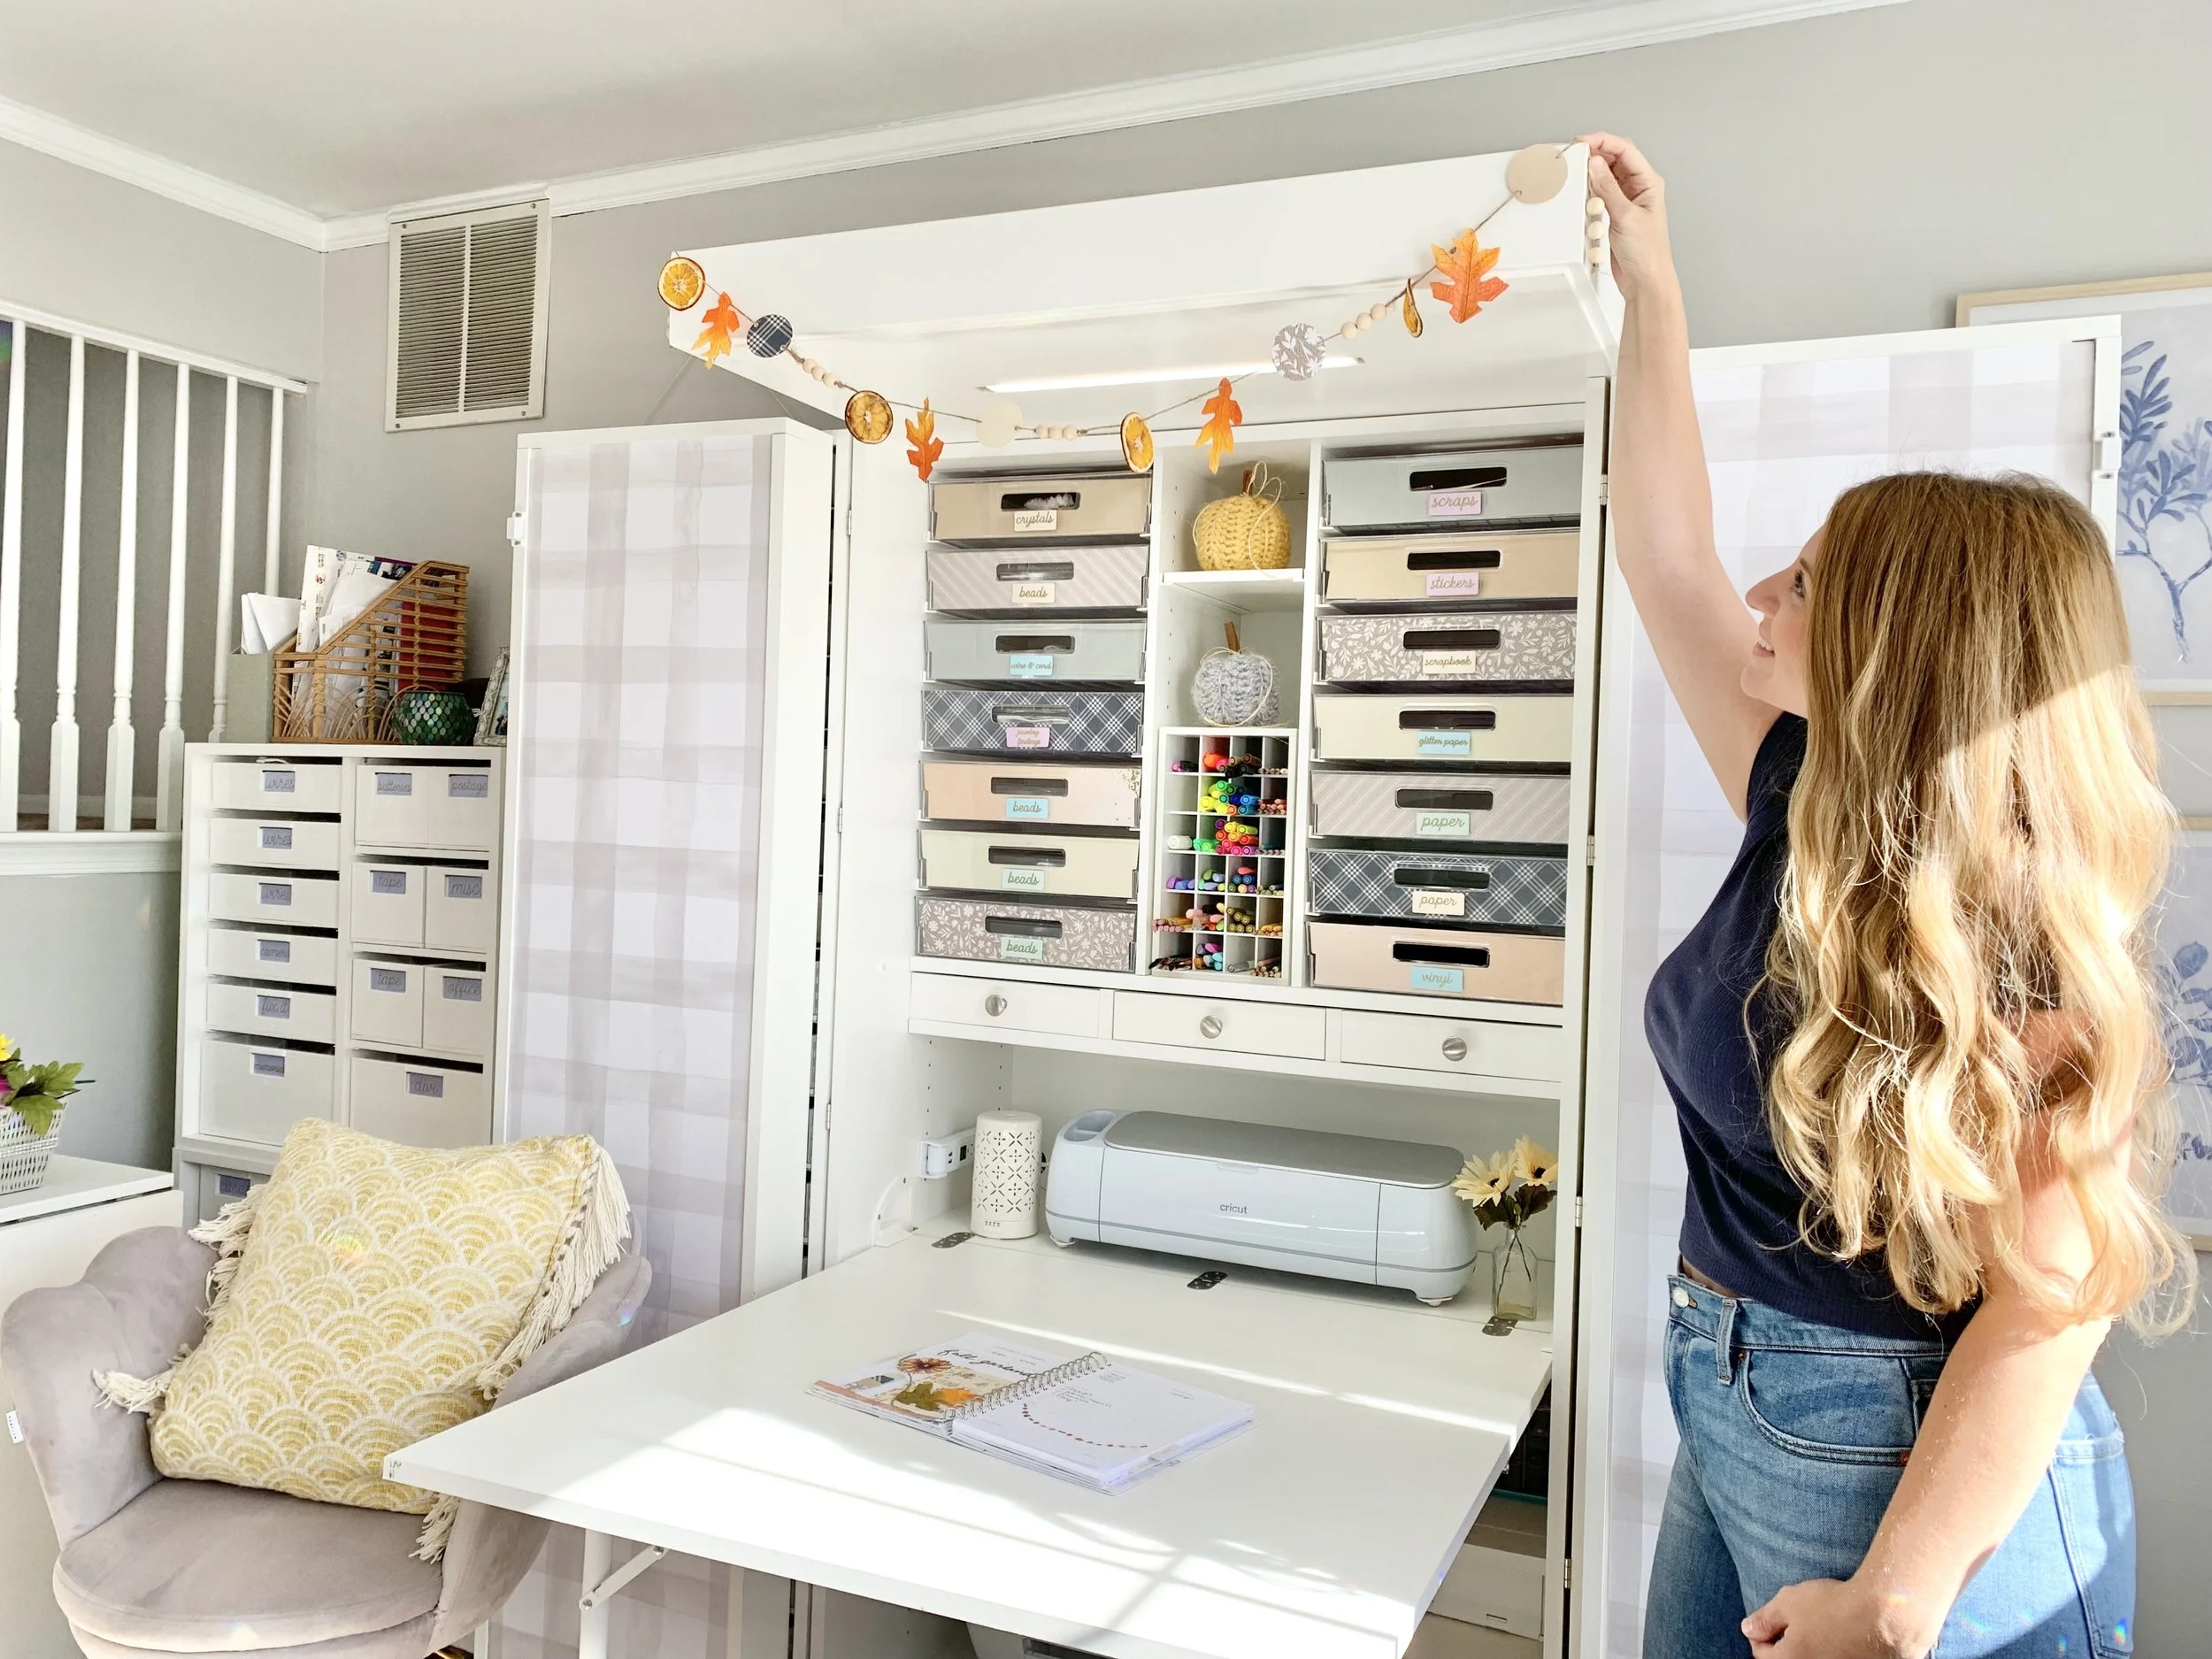
DIY Fall Garland by Desi: great for your DreamBox crown, mantle, classroom, doorway or over a window!
Step 1. Create Your Vision & Gather Inspiration
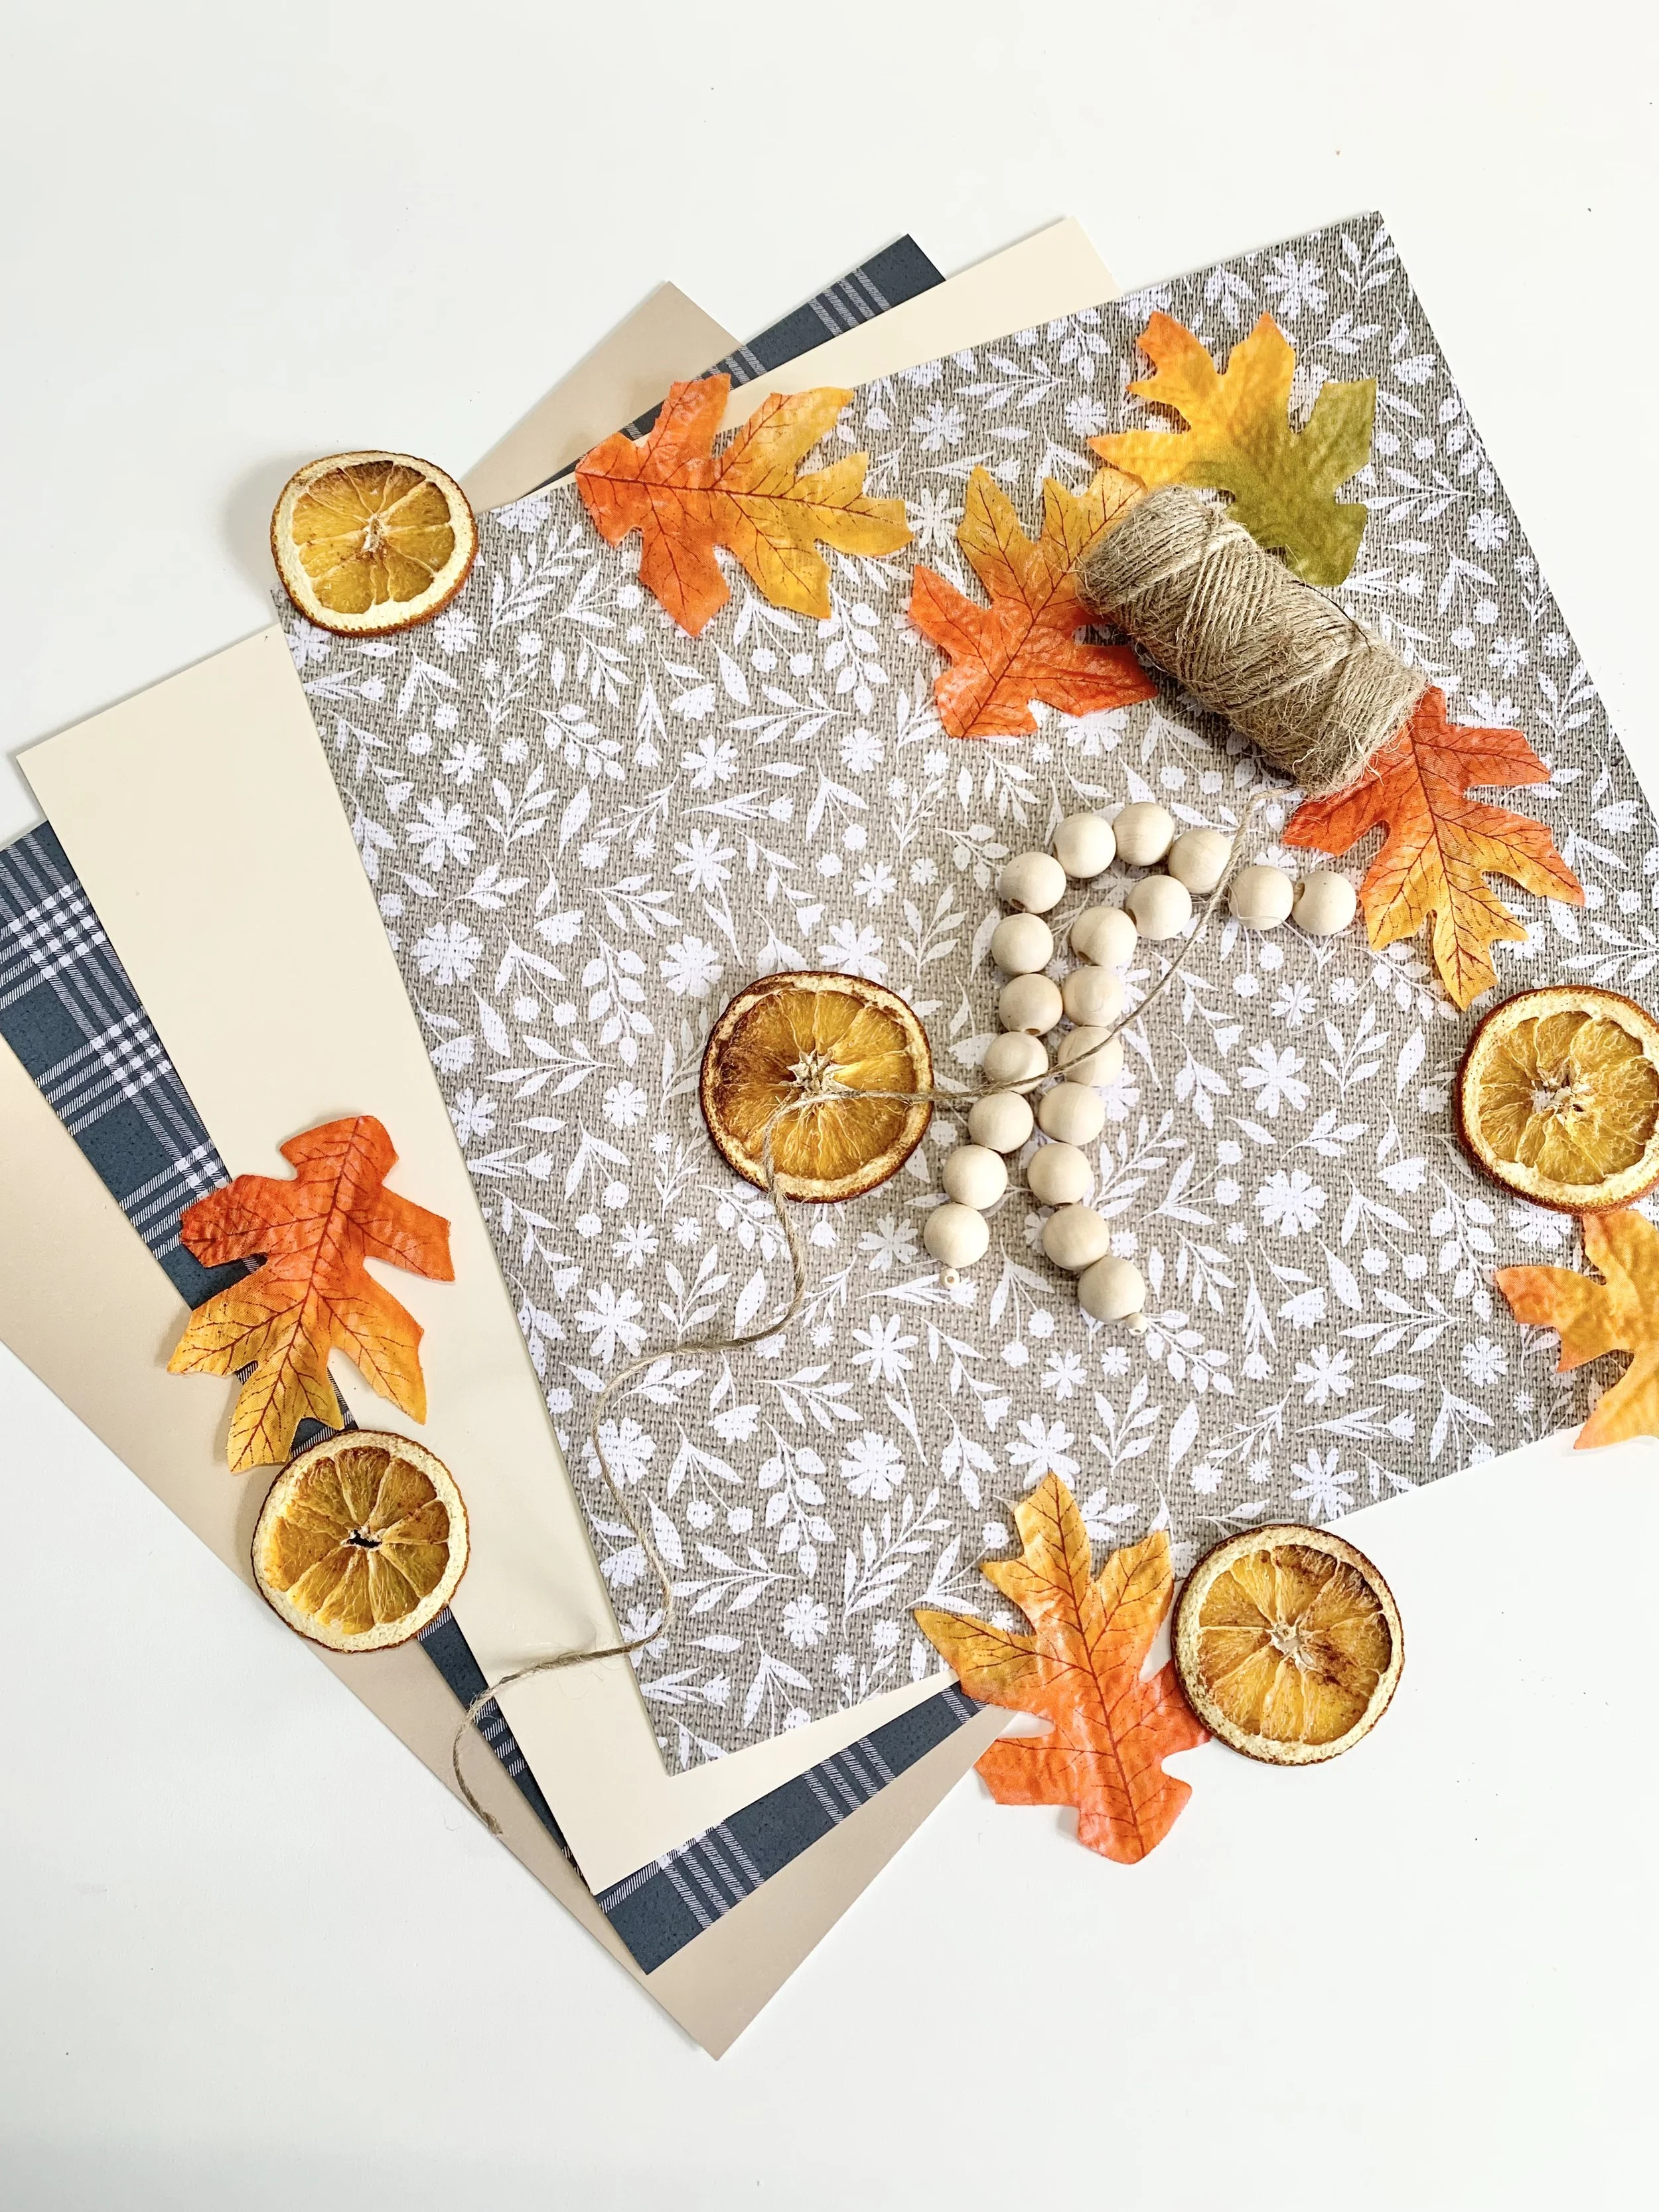
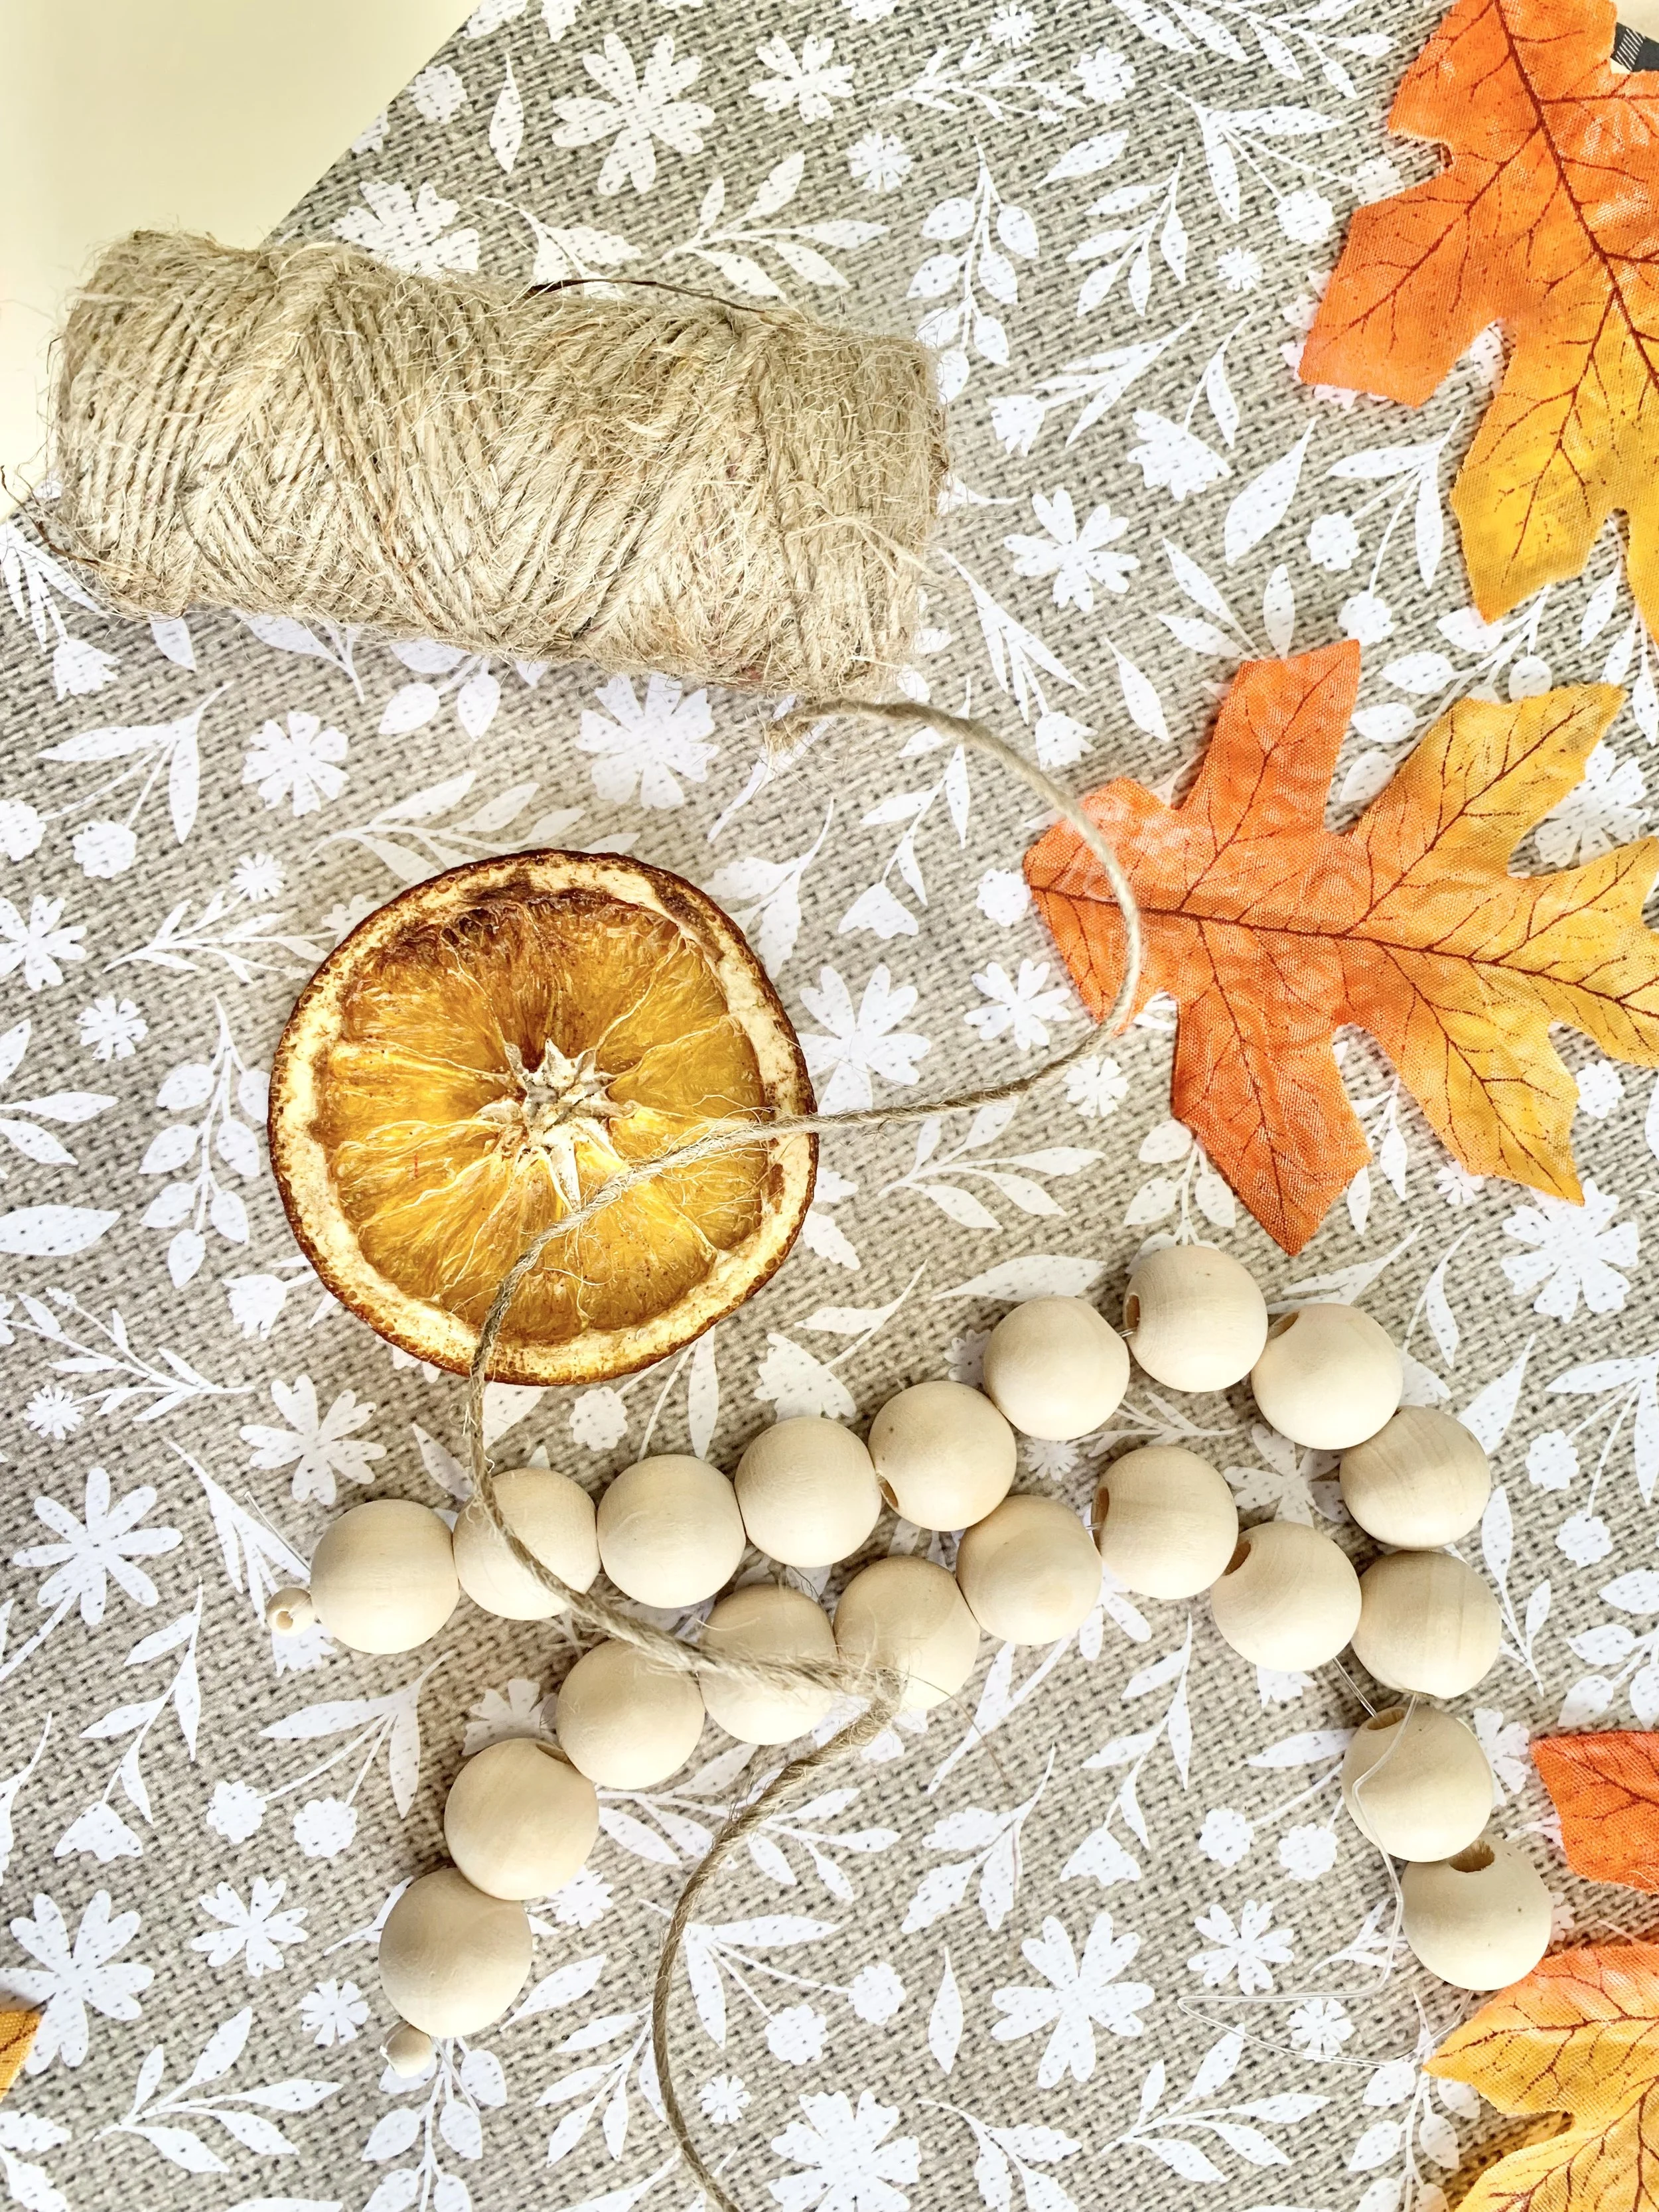
I knew I wanted to incorporate dried oranges. I have seen this trend floating around on Pinterest since Christmas! This was the perfect time to try it out. I also wanted to do a fall-themed garland without pumpkins. I decided instead to include leaves, wooden beads, and fall-themed paper!
Grab them here: Similar paper, dried oranges, leaves, wooden beads & twine
Step 2. Grab Your Create Room Planner (or any planner) & Plan Out Your Project
I love my Create Room Planner! It has helped me to focus on the steps needed to execute my ideas. I can get easily sidetracked as a busy working mom. My planner keeps me focused. For this project, I wrote down all the steps and created a quick drawing of how I wanted this garland to look.
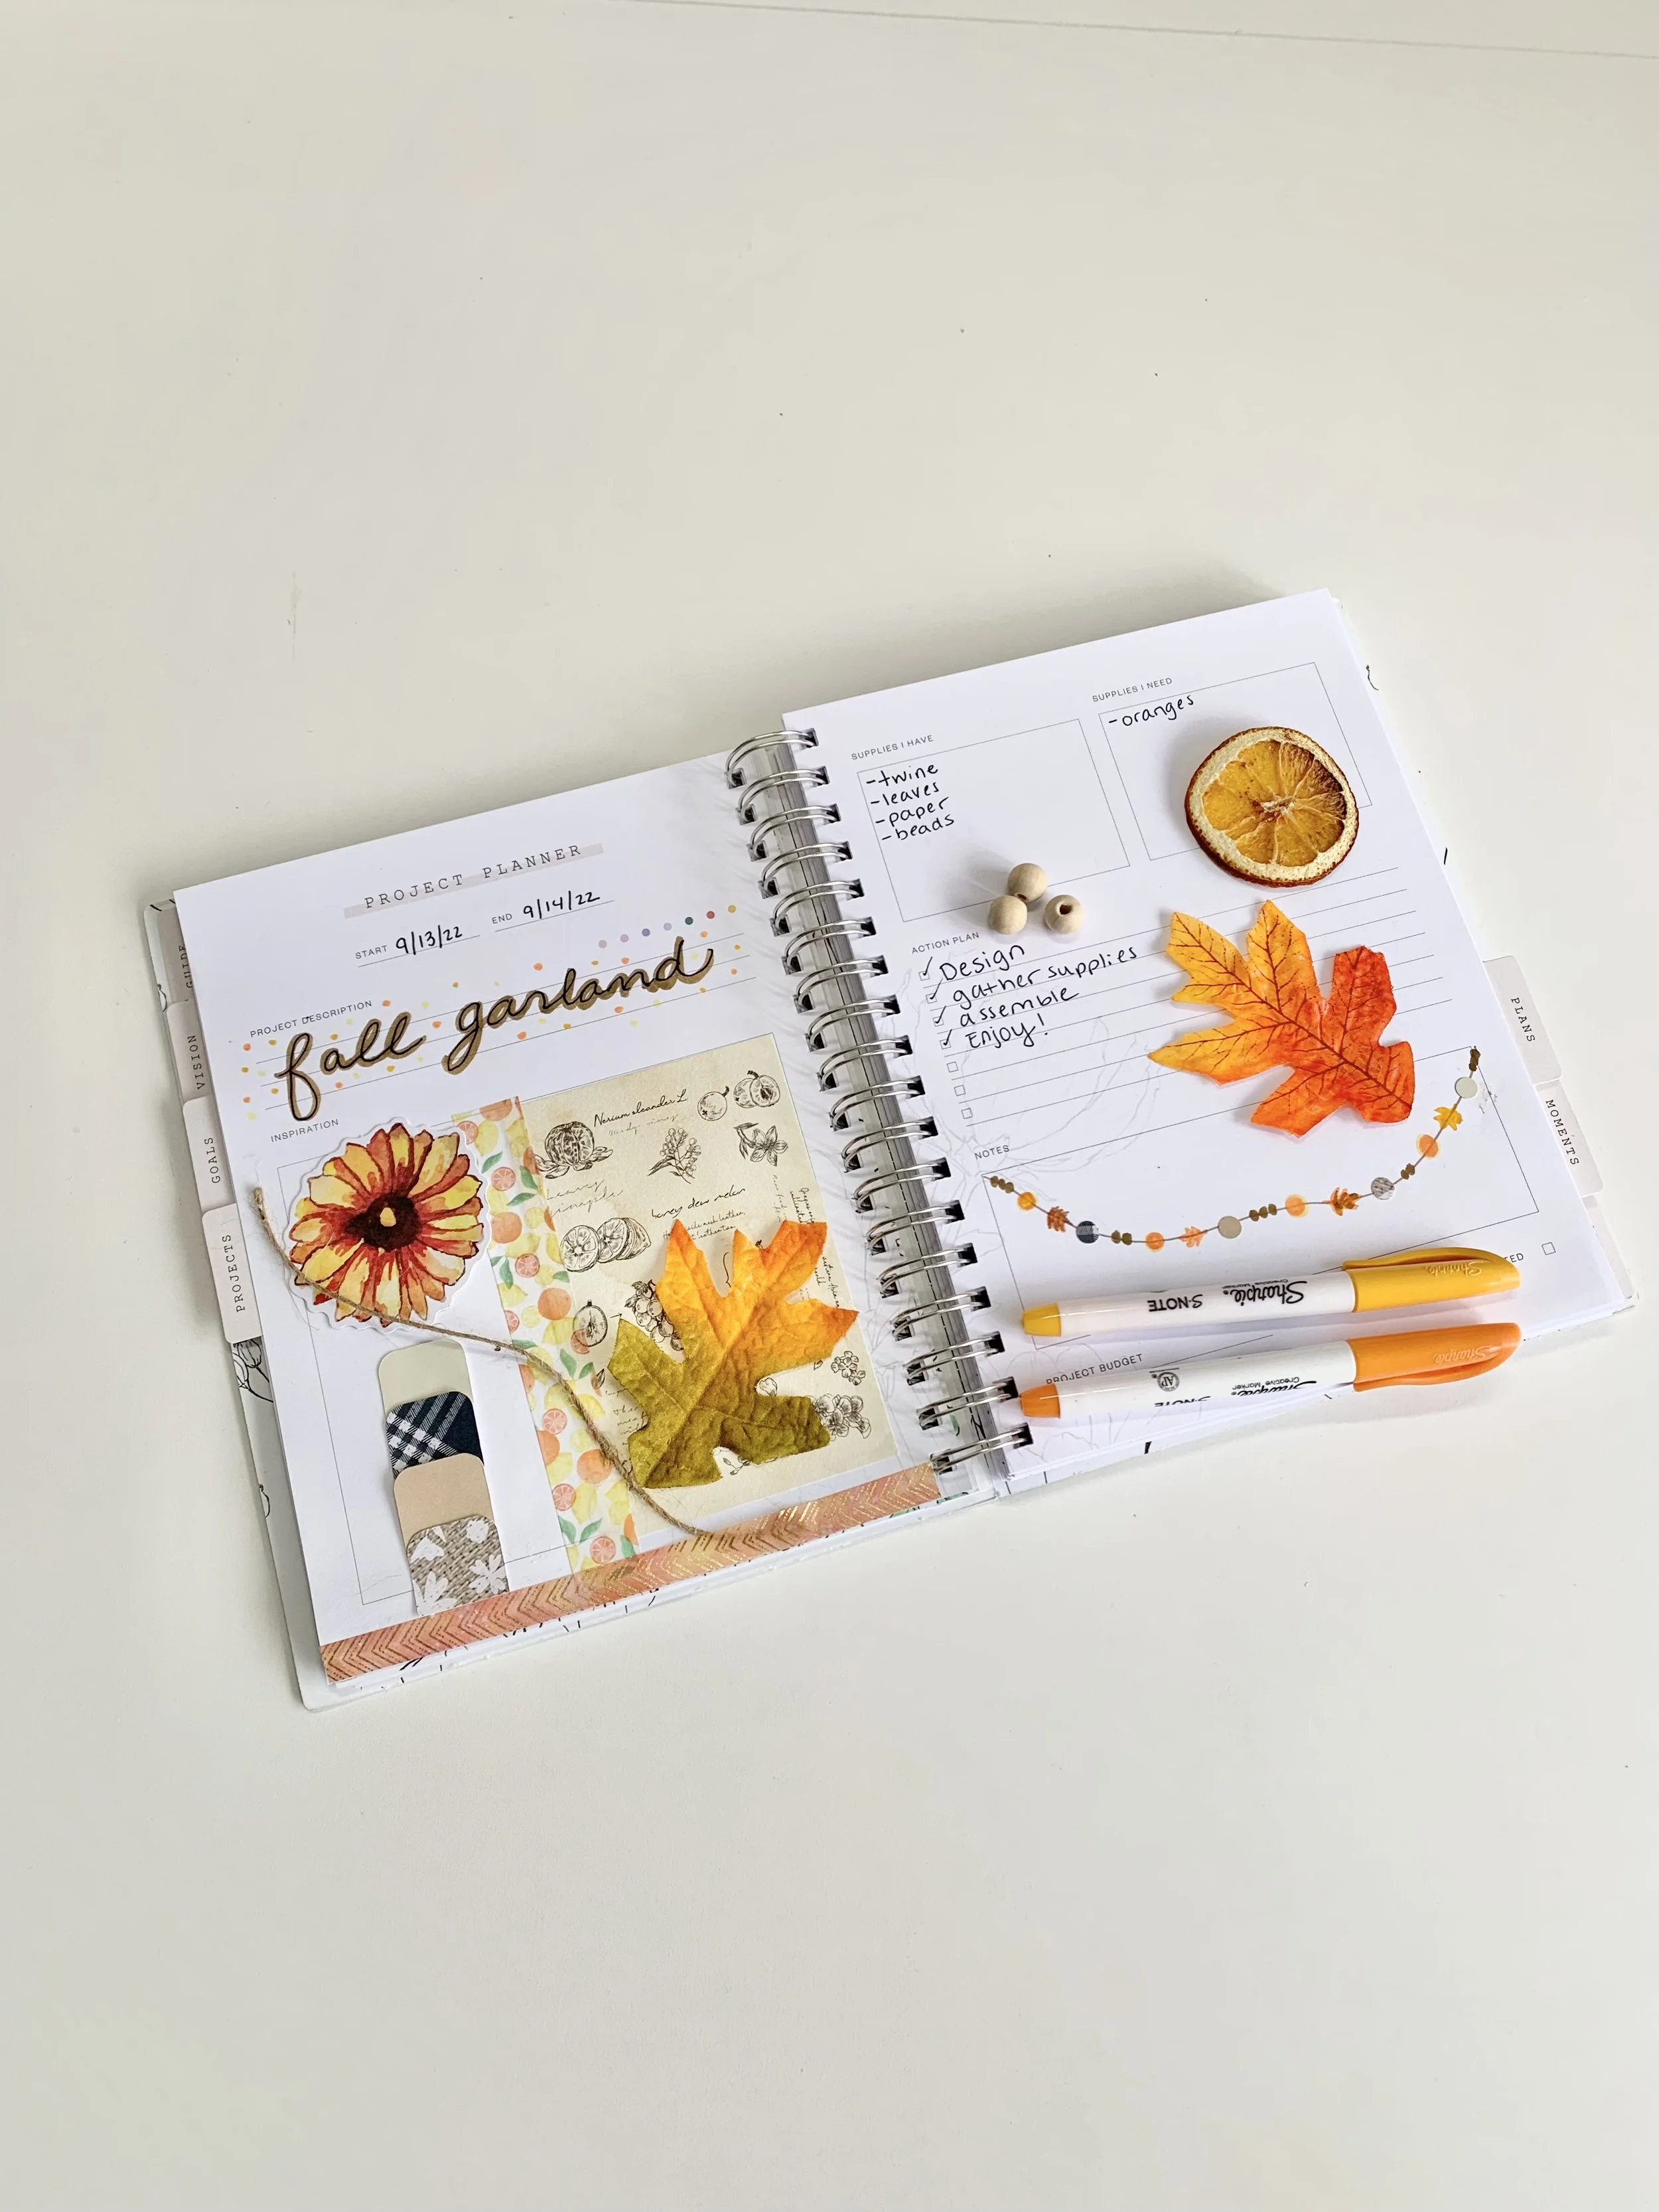
Grab your Create Room planner here
Step 3. Gather Your Supplies
Recommended Supplies:
2 Oranges
1 Baking sheet
Cinnamon
Sea salt
Wooden beads with twine
Artificial leaves
Fall-themed paper
3m Hooks
Craft Scissors
Cricut Maker (optional)
Step 4. Create Your Garland
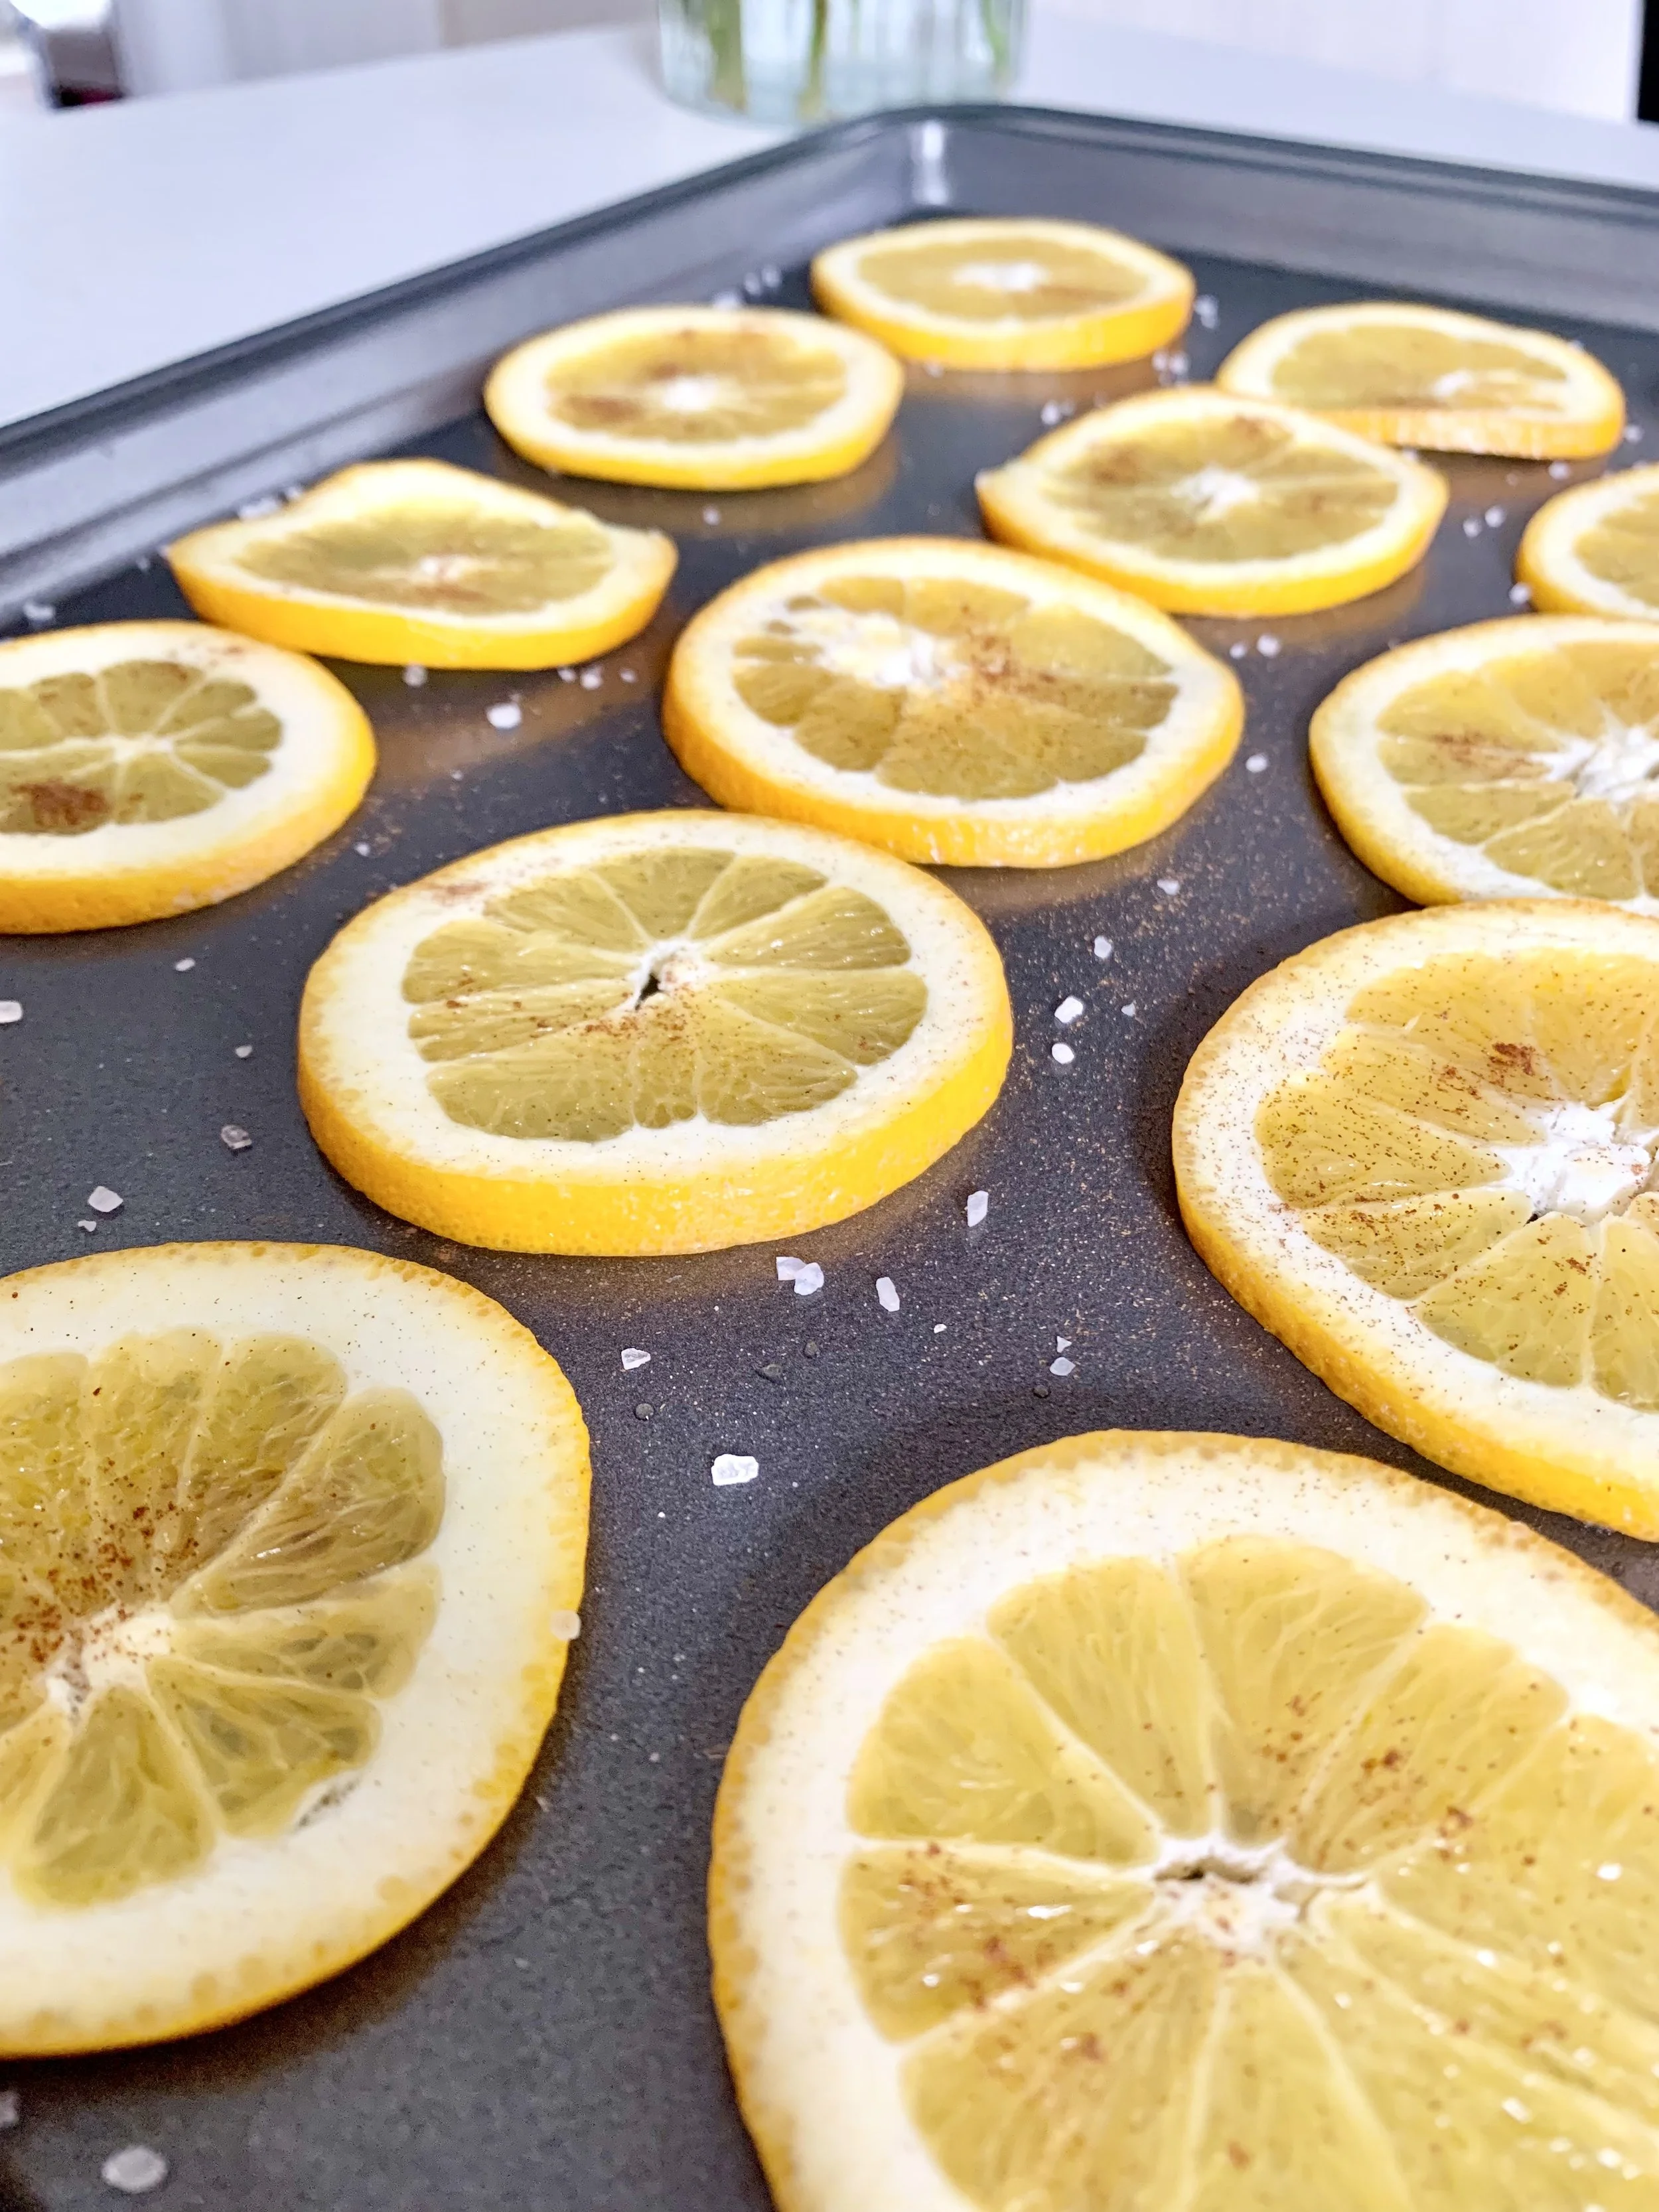
1. Dry out your oranges!
Preheat your oven to 225° Fahrenheit. Slice your oranges and lay them on a non-stick baking sheet. Sprinkle them front and back with cinnamon (for a lovely smell) and sea salt (to help the drying process). Cook for 2 hours (or until they begin to dry and look golden), flipping every 30 minutes! Once they are done, let them cool & completely dry overnight. Your house will smell AMAZING!
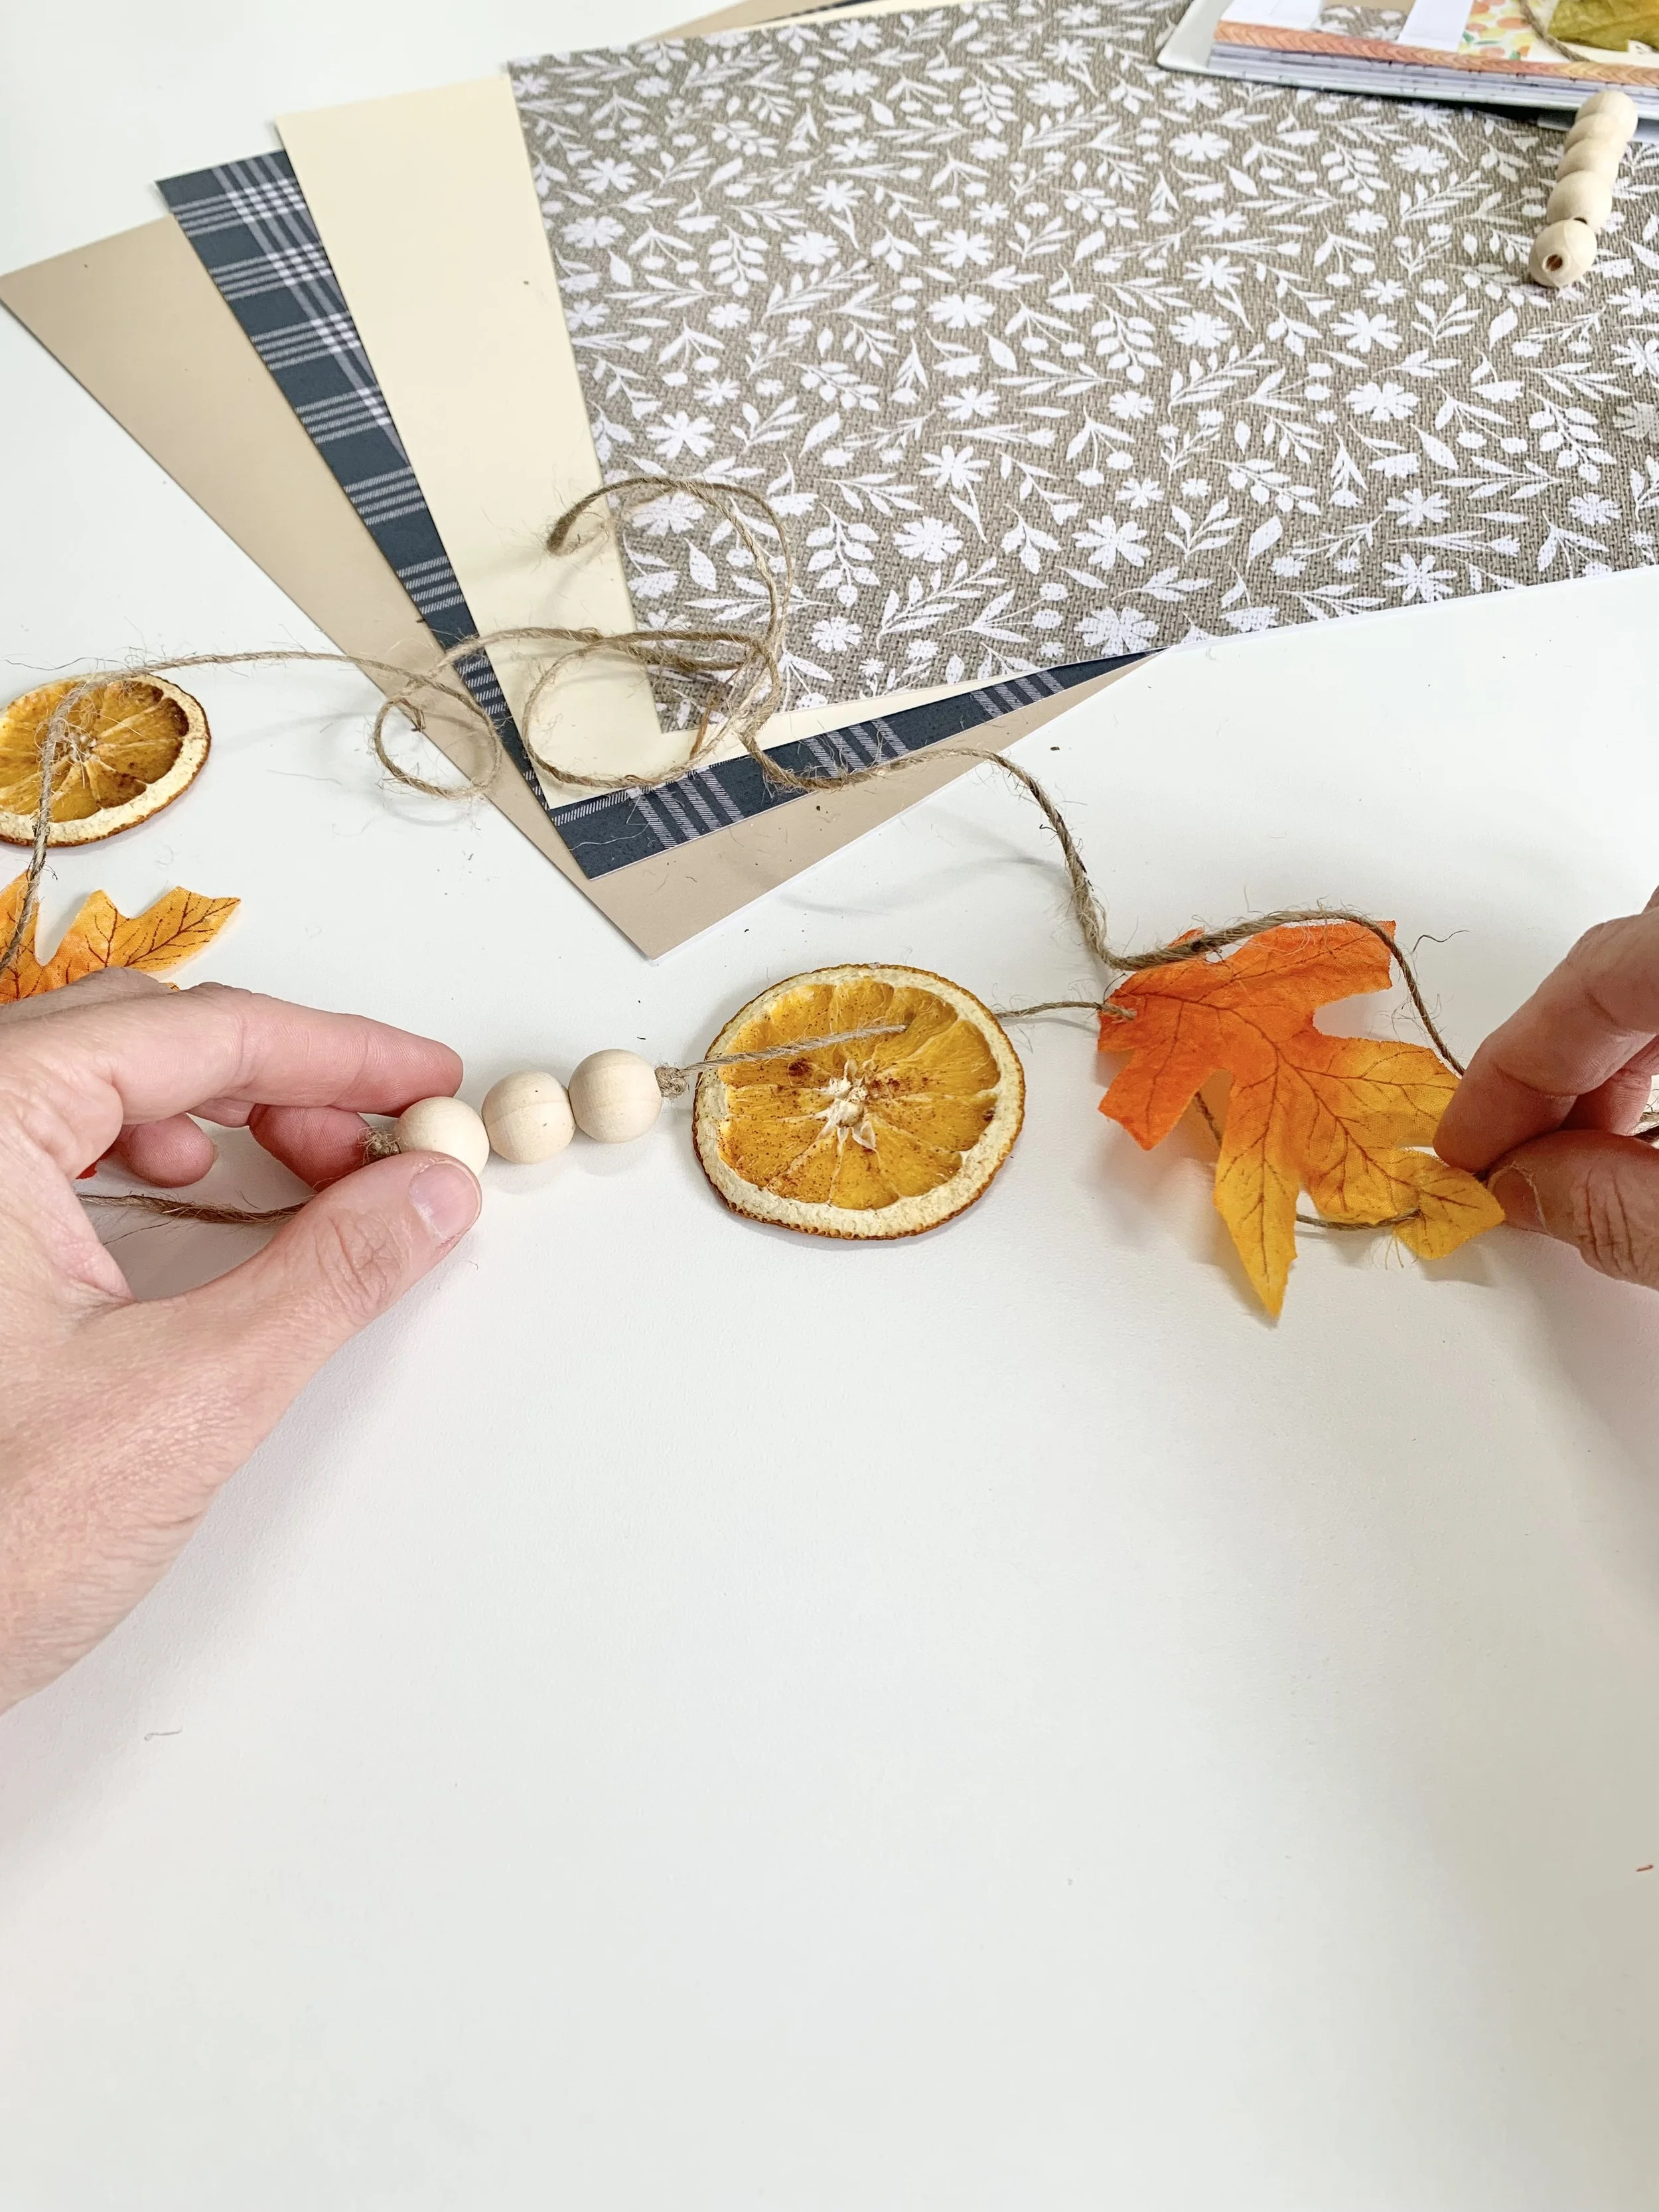
2. Cut your paper shapes!
Using my Cricut Maker, (you can use any Cricut OR you can trace & cut shapes by hand) I cut out circle shapes.

3. Assemble your garland
Now that my oranges are dry and my shapes are cut, I can begin to assemble. Using twine, I began creating the design I had already planned out in my Create Room Planner. I did not want it to look perfect (I like a mismatched look). String your beads first, then tie a knot on both sides of the beads to hold them in place, then string in a leaf, then a paper circle, then an orange, and repeat! I made sure to cut small holes into each item (aside from the beads since they already are predrilled).
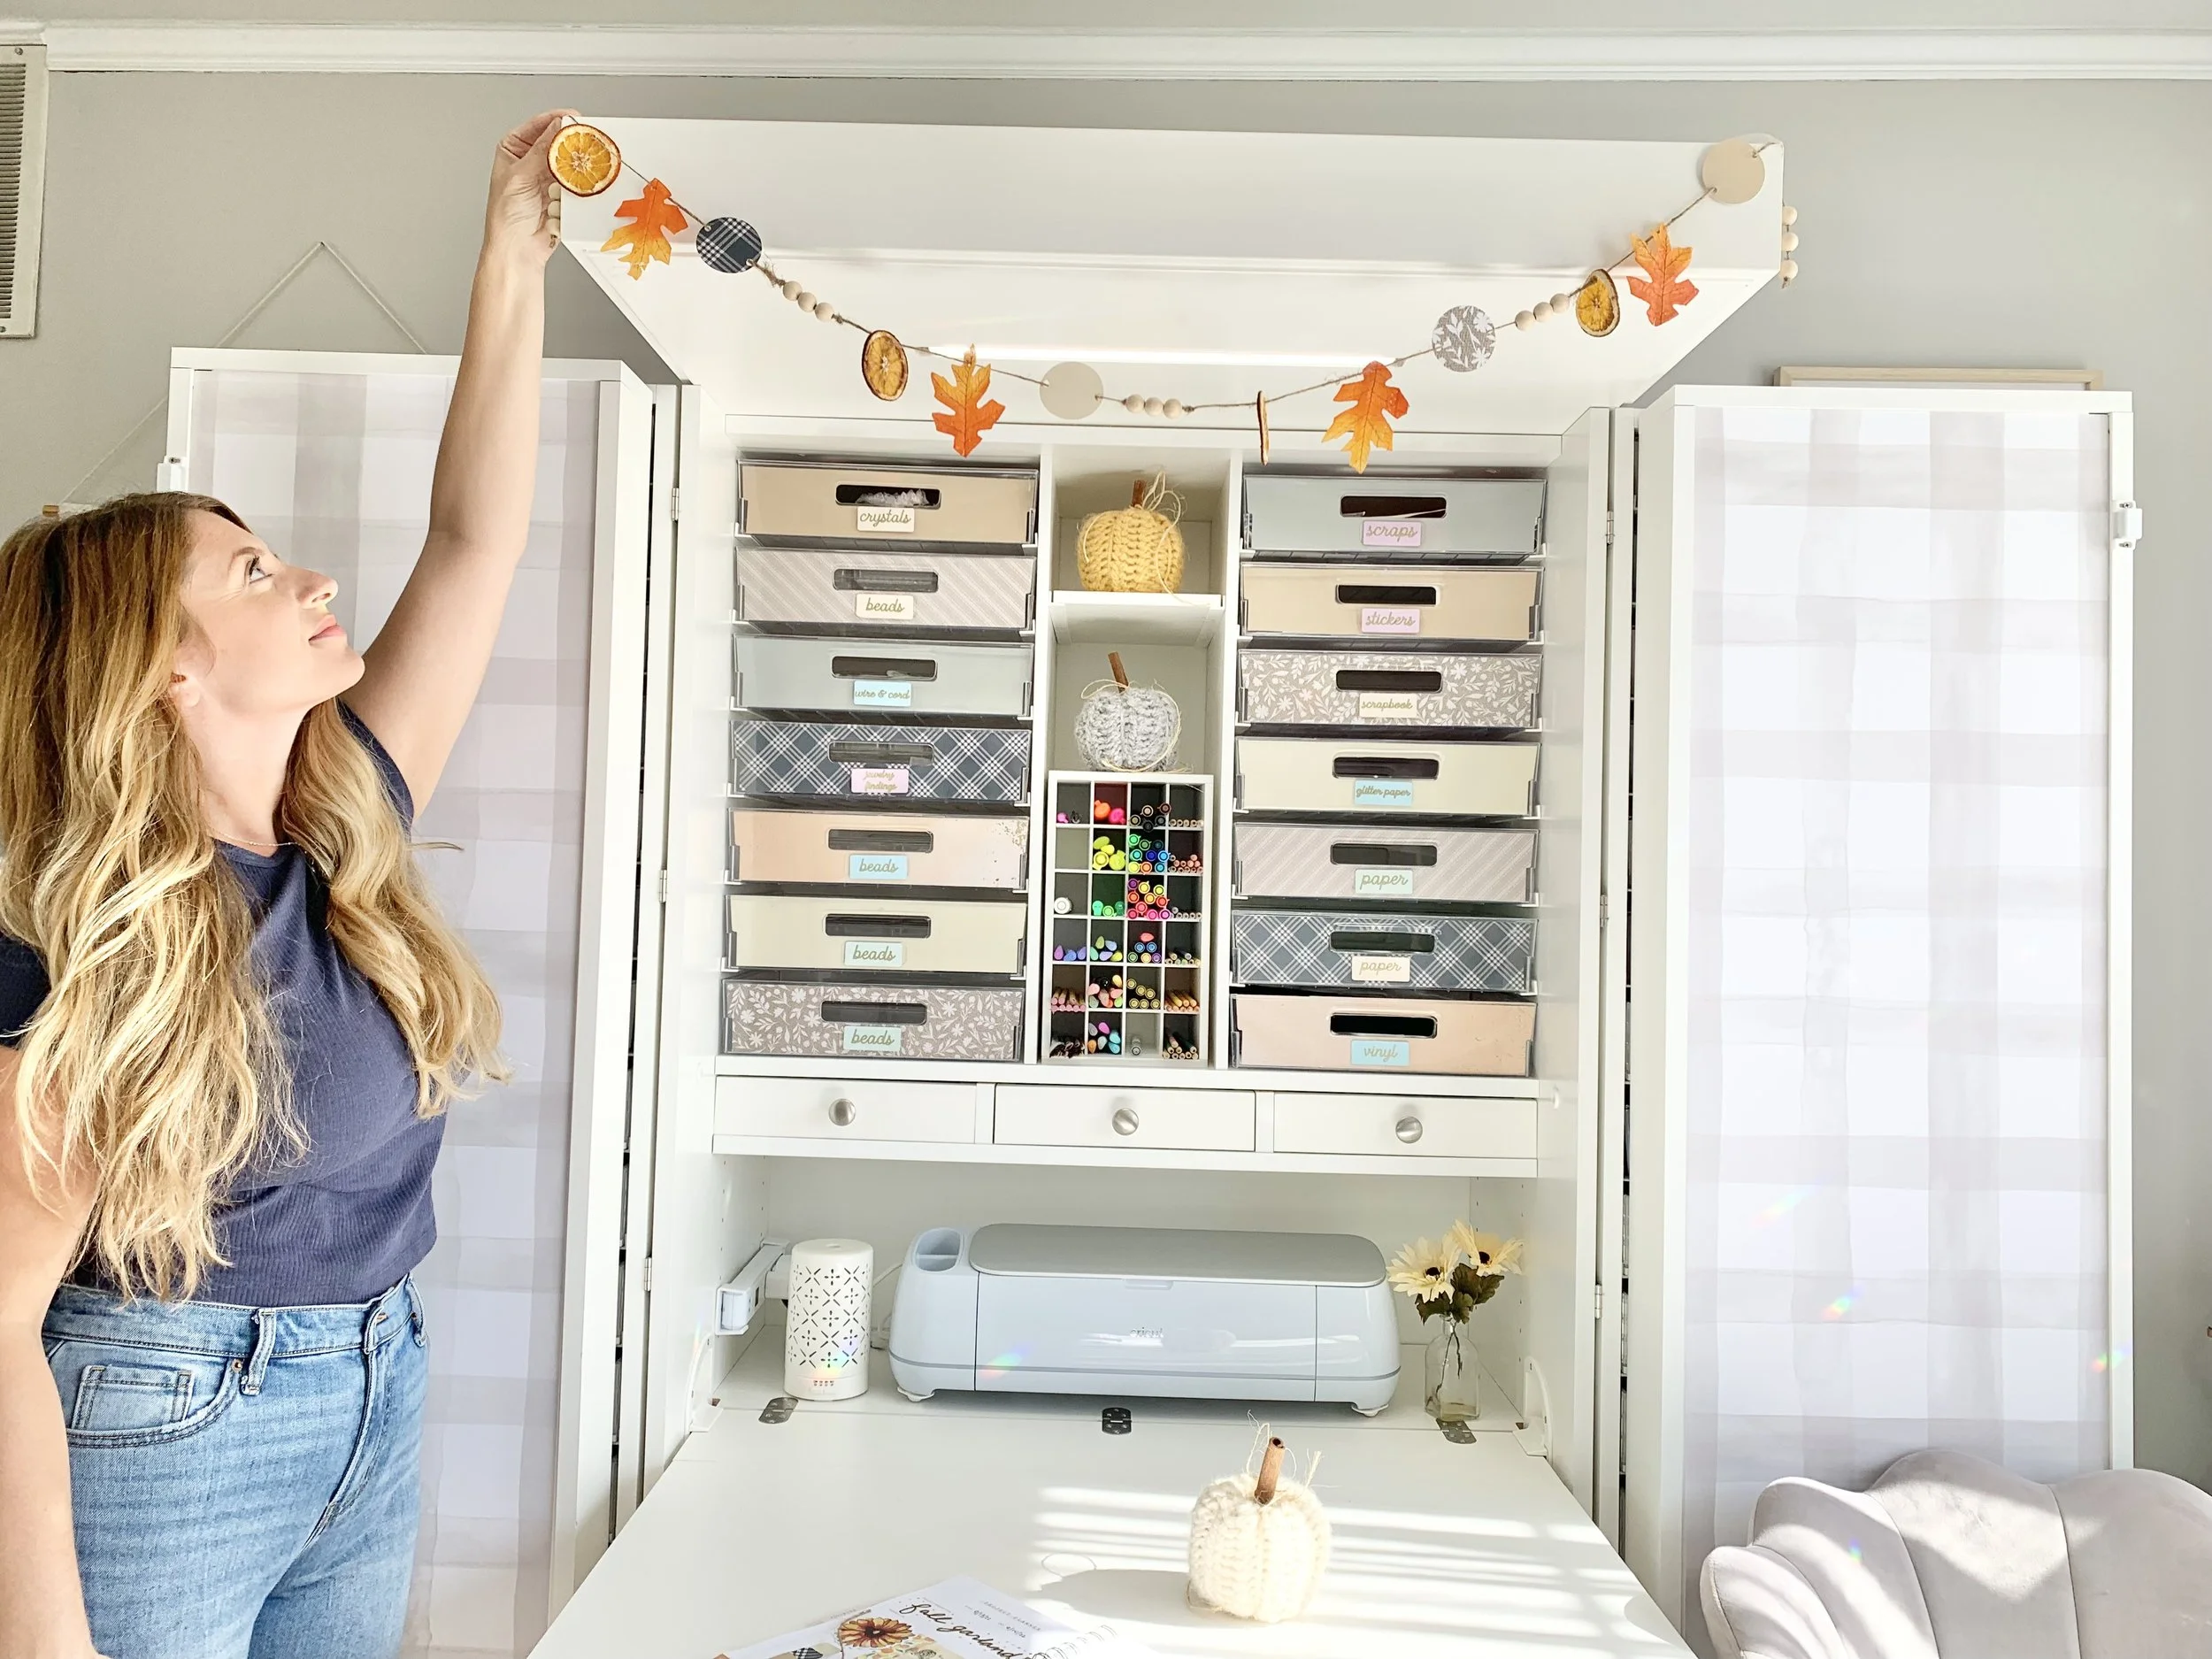
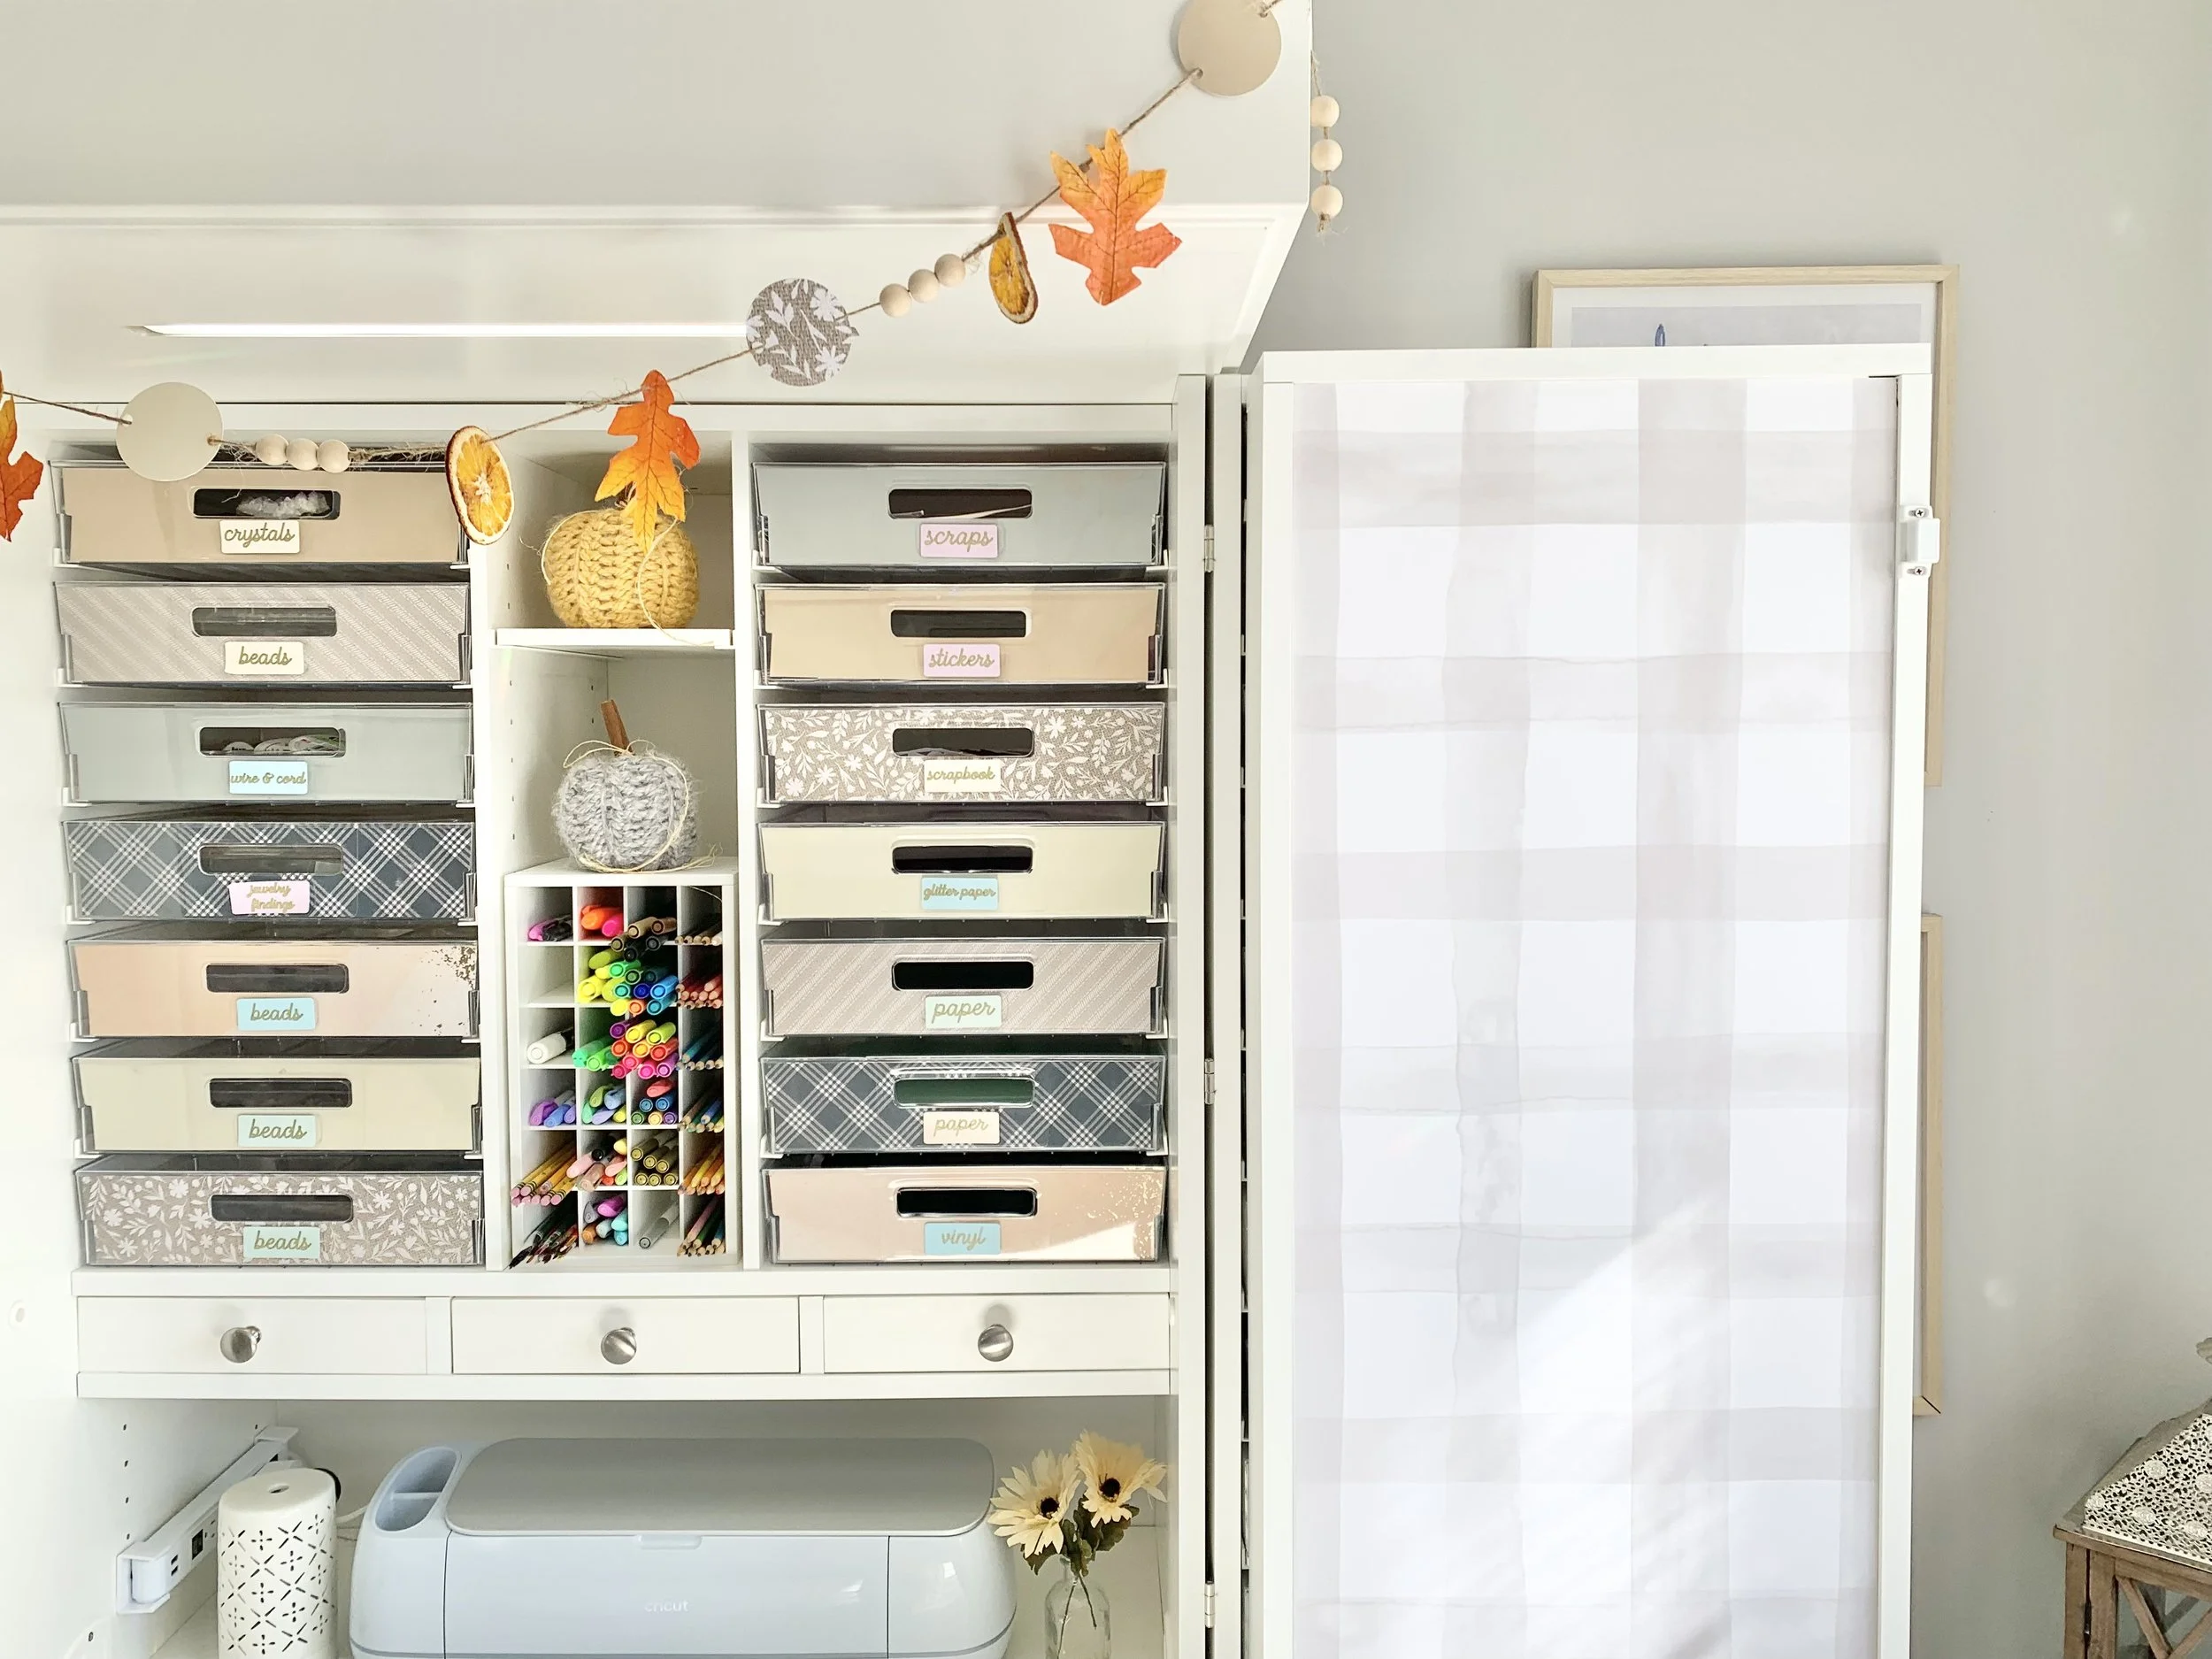
4. Attach your garland to your DreamBox Crown, mantle, windows , doorways, or wherever you want!
Attach your garland to your DreamBox Crown using 3m hooks. I got my hooks on Amazon. You can also use tape!
Step 5. Admire Your Work! You did it!
Time to celebrate your work! The best part about creating is knowing that you thought of an idea and you brought it to life. Enjoy.
I hope you find the time to create something beautiful this fall season! Fall happens to be my favorite season. I especially love when the leaves change. Come back next week for a fun kids craft with a fall inspired them! Subscribe to my emails to be notified!
xo Desi